איך עובד Redux Toolkit עם TypeScript ומתי להשתמש בו
סער טויטו
Software & Web Development
25 בנובמבר 2024
•
20 דקות קריאה
TL;DR
Redux Toolkit הגרסה הרשמית של Redux — מסירה boilerplate ומפשטת ניהול state עם createSlice ו-createAsyncThunk.
Store, Actions, Reducers Store הוא מקור האמת היחיד; Actions מגדירים מה קרה; Reducers מעדכנים את ה-state.
Immer מאחורי הקלעים Redux Toolkit משתמש ב-Immer — מאפשר לכתוב קוד "mutable" שבפועל יוצר עותק חדש של ה-state.
Redux vs Context API Context מתאים לאפליקציות קטנות; Redux עדיף לאפליקציות גדולות עם ביצועים ואופטימיזציות מובנות.
Redux Toolkit במבט כללי
Redux Toolkit הוא הדרך הרשמית לכתוב Redux ב-2024. הוא מסיר את רוב ה-boilerplate של Redux הקלאסי: אין צורך לכתוב action types, action creators, או לנהל immutability ידנית. createSlice מאחד את כל אלה, ו-createAsyncThunk מטפל בבקשות אסינכרוניות.
במאמר זה אנו נדון מה זה Redux, למה אנחנו צריכים אותה ומתי משתמשים בה. לאחר מכן נראה כיצד ליישם Redux Toolkit (הגרסה החדשה) עם TypeScript ב-React.js.
מה זה Redux?
Redux היא ספריית JavaScript פופולרית שמשמשת לניהול מצב / מידע באפליקציה בצורה מסודרת ומובנת (state management). לדוגמה, באתרי E-commerce משתמשים ב-Redux כדי לשמור ולנהל מגוון פעולות שאנחנו עושים באתרים מסוג זה, לדוגמה ניהול המוצרים שהוספנו לסל, ניהול כמות המוצרים שיש לנו בסל, ניהול השילוח וכדומה.
הטרמינולוגיה של Redux:
Redux מורכבת משלושה יחידות שפועלות ביחד על מנת ליצור זרימה וניהול תקין של אותן הנתונים / מצב:
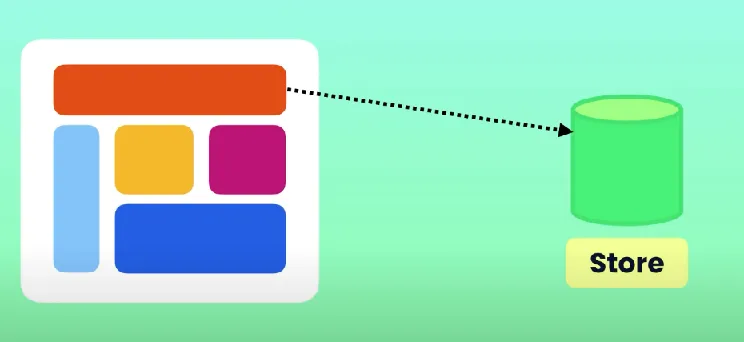
Store:
store היא אובייקט המחזיק את כל הנתונים ומצב האפליקציה. ה-store הוא ה-single source of truth. מכאן נשאב את הנתונים שאספנו מהאתר ונזרים אותם לשאר חלקי האפליקציה שצריכים את אותו מידע.
By Mosh Hamedani
הסבר על Slice
אז Slice מאפשר לנו לחלק את הנתונים (state) לחלקים לוגיים לפי ישויות (entities) כמו `user`, `order`, `product` וכדומה. כל Slice מרכז בתוכו את כל מה שקשור לאותה ישות – כמו הנתונים, הפעולות (actions) וגם את הלוגיקה (reducers) שמטפלת בהם.
למרות שכל Slice מופרד לוגית, בפועל כולם נשמרים בתוך עץ נתונים אחד מרכזי (global state). היתרון בגישה הזו הוא שכשאנחנו משנים נתונים בסלייס מסוים, רק אותו Slice מתעדכן - ושאר הסלייסים שלא משתמשים באותם נתונים לא עוברים רינדור מחדש. זה משפר את הביצועים ושומר על אפליקציה יעילה ומודולרית.
הסבר על Actions
Actions הם אובייקטים שמייצגים את הכוונה לשנות את מצב האפליקציה (state). כל action מכיל מאפיין בשם type, שמציין איזו פעולה יש לבצע. לעיתים קרובות, אנחנו גם יכולים להוסיף נתונים נוספים תחת payload אובייקט, שמספק מידע רלוונטי לפעולה.
לדוגמה, אם אנחנו רוצים להוסיף מספר למונה (counter), נשלח action כזה:
{ type: 'counter/incrementByAmount', payload: 5 }
בגרסת Redux Toolkit אין צורך להגדיר את ה-type באופן ידני - הוא נוצר אוטומטית על סמך שם ה-slice (למשל counter) ושם הפעולה (למשל incrementByAmount). כך הקוד נעשה ברור יותר, וקל יותר לתחזוקה ולניהול.
הסבר על Reducers
Reducers הם פונקציות טהורות (pure functions) שמקבלות את הנתונים הנוכחיים (state) ואת הפעולה שאנחנו רוצים לבצע (action), ומחזירות גרסה חדשה של הנתונים בהתאם ללוגיקה שביצענו.
המטרה של reducer היא לעדכן את הנתונים בלי לשנות את האובייקט המקורי, אלא להחזיר אובייקט חדש בזיכרון עם הערכים החדשים. כלומר, לא מבצעים שינוי ישיר על מה שכבר קיים, אלא יוצרים עותק חדש (אובייקט חדש) שמכיל את העדכון - וזה נקרא immutability ו-Redux Toolkit משתמשת ספרייה בשם Immer מאחורי הקלעים שדואגת לשמור על עקרון ה-immutability - על ידי כך שהיא יוצרת אובייקט חדש בזיכרון.
לדוגמה, אם נרצה להוסיף 1 לערך כלשהו, הפונקציה לא תעדכן את המספר עצמו - אלא תחזיר אובייקט חדש שבו המספר גדל ב-1.
ככה זה נראה בלי Immer (Redux רגיל):
return { ...state, value: state.value + 1 };
וככה זה נראה עם Immer (Redux Toolkit):
state.value++;
אבל מה קורה לאובייקט הישן?
אבל מה קורה לאובייקט הישן? אז האובייקט הישן, נשאר בזיכרון כל עוד מישהו עדיין משתמש בו (למשל קומפוננטה שעדיין מציגה אותו). ברגע שאין בו צורך - מנגנון ה-Garbage Collector של JavaScript יזהה זאת וימחק אותו אוטומטית מהזיכרון.
לפני שנראה את התמונה של כולם ביחד, אנחנו רוצים לדבר אתכם על האפשרות של לבצע קריאות API עם Redux Toolkit.
createAsyncThunk:
באפשרותנו להשתמש (לא חובה) בפונקציה createAsyncThunk שמאפשרת טיפול פשוט יותר בבקשות לשרת וטיפול בשגיאות, ומשפר את ארגון הקוד. פונקציה זו באופן אוטומטי נותנת לכם גישה לשלושת המצבים בהם יכולה הבקשה שלכם להיות (pending, fulfilled and rejected).
יישום Redux Toolkit עם TypeScript:
לפני שאתם רואים את התמונות, אנחנו ממליצים לקורא את המאמר הזה לפחות פעמיים כדי להבין את Redux & Redux Toolkit. זה מנגנון שיכול להיות מסובך להבנה בפעם הראשונה, לכן קריאה שנייה בהחלט תתרום לכם. על כל שורת קוד, הוספנו הערה שתעזור לכם להבין טוב יותר את הקוד שלנו.
שלב ראשון - הורדת ה-packages:
npm i @reduxjs/toolkit
npm i react-redux
שלב שני - יצירת תיקיות וקבצים לניהול תקין של Redux Toolkit:
app\hooks.ts
app\store.ts
features\counter\slice.ts
features\counter\api.ts
index.tsx
features\counter\Counter.tsx
בקובץ הראשון: hooks.ts
// Import hooks, types from react-redux and app store.
import {
  TypedUseSelectorHook,
  useDispatch,
  useSelector
} from 'react-redux';
import type { RootState, AppDispatch } from './store';

// Custom useDispatch hook with AppDispatch type for type safety
export const useAppDispatch = () => useDispatch<AppDispatch>();

// Custom useSelector hook with RootState type for type safety
export const useAppSelector: TypedUseSelectorHook<RootState> = useSelector;
בקובץ השני: store.ts
// Import required functions and slices
import { configureStore } from '@reduxjs/toolkit';
import counterReducer from '../features/counter/counterSlice';

// Configure Redux store with counter reducer
export const store = configureStore({
  reducer: {
    counter: counterReducer,
  },
});

// Define and export AppDispatch and RootState types
export type AppDispatch = typeof store.dispatch;
export type RootState = ReturnType<typeof store.getState>;
בקובץ השלישי: slice.ts
// Import necessary functions and types from Redux Toolkit import { createAsyncThunk, createSlice, PayloadAction } from '@reduxjs/toolkit'; import { RootState } from '../../app/store'; import { fetchCount } from './counterAPI';
// Initialize counter slice with state, reducers, extraReducers. export const counterSlice = createSlice({ name: 'counter', initialState, reducers: { increment: (state) => { state.value += 1; // Increment the counter by 1 }, decrement: (state) => { state.value -= 1; // Decrement the counter by 1 }, incrementByAmount: (state, action: PayloadAction<number>) => { // Increment the counter by the specified amount state.value += action.payload; }, }, extraReducers: (builder) => { builder .addCase(incrementAsync.pending, (state) => { // Status 'loading' during pending async request. state.status = 'loading'; }) .addCase(incrementAsync.fulfilled, (state, action) => { // Status 'idle' during fulfilled async request. state.status = 'idle'; // Increment the counter by the async response value state.value += action.payload; }) .addCase(incrementAsync.rejected, (state) => { // Status 'failed' during rejected async request. state.status = 'failed'; }); }, });
// Export actions for use elsewhere in the app. export const { increment, decrement, incrementByAmount } = counterSlice.actions;
// Create selector for current count value from state. export const selectCount = (state: RootState) => state.counter.value;
// Export the reducer for use in the store export default counterSlice.reducer;
בקובץ הרביעי: api.ts
// Mock async data request function
export function fetchCount(amount = 1) {
  return new Promise<{ data: number }>((resolve) =>
    setTimeout(() => resolve({ data: amount }), 1000)
  );
}
בקובץ החמישי: index.tsx
import React from 'react'; import { createRoot } from 'react-dom/client'; import { Provider } from 'react-redux'; import { store } from './app/store'; import App from './App'; import reportWebVitals from './reportWebVitals'; import './index.css';
useAppSelector - נועד כדי למשוך פיסת מידע מה-store שלנו.
useAppDispatch - מחזיר פונקציה (dispatch) שנועדה לבצע קריאה ל-actions שהגדרנו.
סיכום מערכת Redux:
כאשר אנו רוצים להשתמש בנתונים מסוימים מה-Store, נשתמש ב-hook בשם useAppSelector, ונקבע בתוכו את ה-selectorState הרלוונטי, במקרה שלנו – selectCount.
על מנת לעדכן את הנתונים הקיימים ב-Store, נשתמש ב-hook בשם useAppDispatch, שמחזיר פונקציה בשם dispatch.
כפי שניתן לראות בשורות 34, 44, 60 ו-67, אנו משתמשים ב-dispatch ומעבירים לה את ה-action המתאים, הכולל שני תכונות – 'type' ו-'payload'.
כל action כולל את תכונת 'type' המתארת את הפעולה שיש לבצע(אם לא מגדירים type, יש type ברירת מחדל), ותכונה (אופציונלית) בשם 'payload', המכילה נתונים נוספים הדרושים לביצוע הפעולה.
לאחר שקראנו ל-action המתאים, התהליך ממשיך ל-reducer, שבוחר את ה-action הרלוונטי ומבצע את העדכון המבוקש.
כשהעדכון הושלם, הנתונים המעודכנים מגיעים לכל קומפוננטה המשתמשת באותם הנתונים, ולאחר מכן מתבצע רינדור (ריענון) של הקומפוננטות המעורבות.
Context API VS Redux
לפעמים עולה שיח למה אנחנו צריכים להשתמש ב-Redux Toolkit כשיש לנו Context API. בואו ננסה לענות על השאלה הזו בקצרה:
Context API פשוט וקל יותר לשימוש והקמה, בעוד Redux דורש יותר קוד ועקומת למידה תלולה יותר.
Context API מובנה בתוך React, בעוד ש-Redux היא ספרייה נפרדת שצריך להתקין ולהגדיר.
Context API מתאים יותר לאפליקציות קטנות עד בינוניים, בעוד ש-Redux מיועד לאפליקציות גדולות ומורכבות עם יותר זרימה של נתונים.
ל-Redux יש מספר אופטימיזציות מובנות של ביצועים כדי למזער רינדורים מיותרים, בעוד של-Context API אין אופטימיזציות כאלו.
שאלות נפוצות על Redux Toolkit
מה זה Redux Toolkit ולמה להשתמש בו?
Redux Toolkit (RTK) הוא הגרסה הרשמית והמומלצת של Redux. הוא מסיר boilerplate — אין צורך לכתוב action creators ידנית, סוגי actions נוצרים אוטומטית, ו-Immer מטפל ב-immutability. RTK כולל גם createAsyncThunk לניהול בקשות API עם pending/fulfilled/rejected.
מה ההבדל בין Redux Toolkit ל-Context API?
Context API פשוט, מובנה ב-React ומתאים לאפליקציות קטנות. Redux Toolkit עדיף לאפליקציות גדולות עם: זרימת נתונים מורכבת, אופטימיזציות מובנות למניעת רינדורים מיותרים, DevTools לדיבאג, ו-middleware לבקשות אסינכרוניות.
מה זה createSlice ב-Redux Toolkit?
createSlice מאחד בקובץ אחד את ה-initial state, ה-reducers וה-action creators. הוא יוצר אוטומטית את ה-action types (כמו 'counter/increment') ואת ה-action creators — מה שחוסך הרבה קוד ידני בהשוואה ל-Redux הקלאסי.
מה זה createAsyncThunk ואיך משתמשים בו?
createAsyncThunk מאפשר לבצע בקשות API אסינכרוניות ולטפל אוטומטית בשלושת מצבי הבקשה: pending (טעינה), fulfilled (הצלחה), ו-rejected (שגיאה). בתוך extraReducers של createSlice מגיבים לכל מצב ומעדכנים את ה-state בהתאם.
מה זה Immer וכיצד הוא עובד ב-Redux Toolkit?
Immer היא ספרייה שמאפשרת לכתוב קוד שנראה כאילו משנה ישירות את ה-state (state.value++), אבל בפועל יוצרת עותק חדש. זה מאפשר שמירה על עקרון ה-immutability של Redux מבלי לכתוב code מורכב ידנית.